Running Harbor Locally
30/03/2023
LinkRunning Harbor Locally
If you're willing to contribute to Harbor and/or need its code up & running on your local dev environment then follow along, this guide will get you started.
Here's a video I recorded for the same.

Device Hardware Specs (Recommended)
Before you begin the heavy lifting, you need some hardware juice. Following are some recommendations
Processor: 4 Core Intel i5/i7 10th gen plus or equivalent
RAM: 8GB workable, more is good
Storage: 40-60GB (Docker Images take up space)
If your device doesn't have at least the above specs, maybe try using a cloud VM or GitHub Codespaces or GitPod. There are some great free trials/referral bonuses on providers👨💻
Use these links to get started
Hetzner (Recommended, I use it. Cheap & Powerful)
DigitalOcean
Software Requirements
Following is a list of software with versions you need as of March 2023 for version 2.7.0. Check the official build guide to get the latest version details.
| Software | Required Version |
|---|---|
| docker | 17.05 + |
| docker-compose | 1.18.0 + |
| python | 2.7 + |
| git | 1.9.1 + |
| make | 3.81 + |
| golang* | 1.15.6 + |
*optional, required if you use your own Golang environment.
Speaking of OS, you need a Linux-based OS. I tried WSL, but it didn't work, builds get stuck. You can use virtualization with VMware or Virtual Box if you're on Windows. Even Mac-OS works.
Test your Go & Docker installations before proceeding.
Forking & Cloning
Fork the official Harbor repository to your account.
Following is a snippet from the CONTRIBUTING.md file. Read the comments.
#Set golang environment
export GOPATH=$HOME/go # Add this to your .bashrc/equivalent file
mkdir -p $GOPATH/src/github.com/goharbor

#Get code
git clone --depth=1 [email protected]:goharbor/harbor.git # Add URL of your fork here
# Set the depth, you don't need everything
cd $GOPATH/src/github.com/goharbor/harbor

# The below steps can be performed later, you can skip if you want to

#Track repository under your personal account
git config push.default nothing # Anything to avoid pushing to goharbor/harbor by default
git remote rename origin goharbor
git remote add $USER [email protected]:$USER/harbor.git
git fetch $USER
Note: GOPATH can be any directory, the example above uses $HOME/go. Change $USER above to your own GitHub username.
Prerequisite YAML Config
Navigate to the $GOPATH/src/github.com/goharbor/harbor directory. To get Harbor running, first, a YAML config needs to be done in the make directory.
If you want to take a look at the codebase you can open it in VS Code or your favorite IDE/editor.
A sample YAML config file is provided as the make/harbor.yml.tmpl
Make a copy of this file or you can rename it as well, I'd recommend you make a copy.
The file should be named harbor.yml
Open the file in your favorite text editor.
The file looks something like this
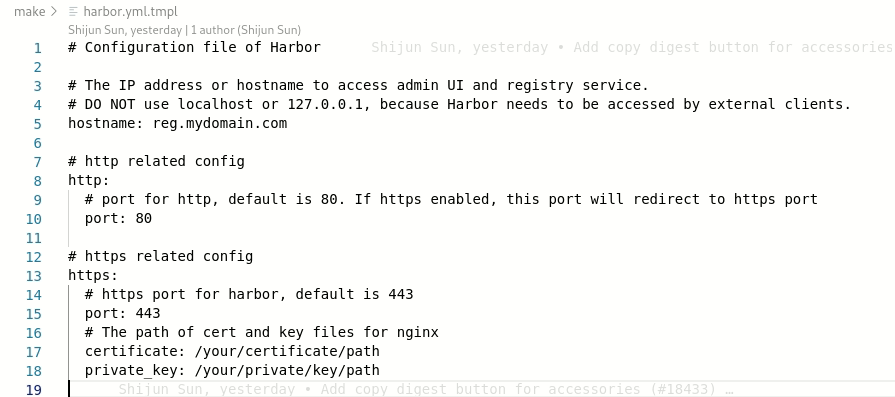
Let's understand the config changes needed
-
hostname: Line 5. Hostname to access admin UI. You can provide any non-conflicting URL here -
HTTP(S) ports: Lines 10 & 15. The HTTP ports that harbor will run on
-
certificate&private_key: Lines 17, 18. The SSL certificate & key files
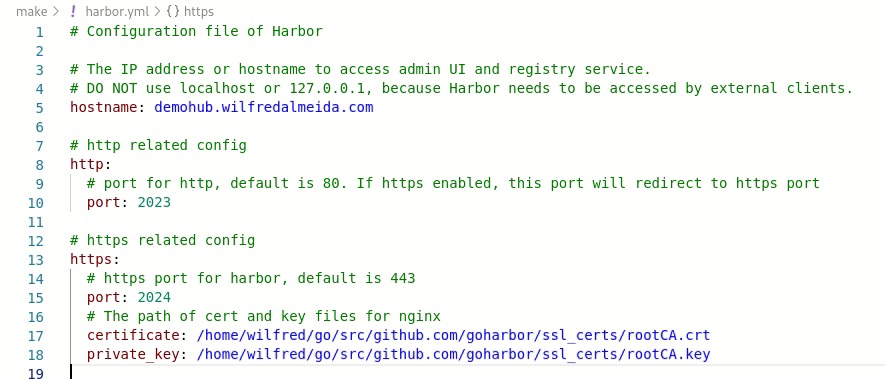
Following is how my config looks followed by an explanation
-
The hostname is a demo subdomain on my domain, it's not live. (Don't hit it hehe)
-
My development environment is a server VM so ports 80 & 443 are occupied, so I chose different ports.
-
The certificate & key paths. Their generation is explained in the following section.
Generating SSL Certificate & Key
To generate, you need OpenSSL installed. You can generate by any other way also, if you're clueless, just follow along.
Navigate to the directory you want the credentials to be generated and execute the following command. Replace demohub.wilfredalmeida.com with the hostname you specified above.
openssl req -x509 \
            -sha256 -days 356 \
            -nodes \
            -newkey rsa:2048 \
            -subj "/CN=demohub.wilfredalmeida.com/C=US/L=San Fransisco" \
            -keyout rootCA.key -out rootCA.crt
Two files named rootCA.key and rootCA.crt will be generated, specify their paths accordingly in the config and save and exit.
Building and Running Harbor
The bare minimum config needed to get Harbor up & running is now complete.
To run harbor, execute the following command in the project root.
make installThere are other options as well to run this, check out the compile guide
Note: This command will take time to execute. It takes ~25 - 30 mins for me, it depends on your hardware juice. Be patient.
If you're running on WSL, your build might get stuck at the following stage for which I have no solution
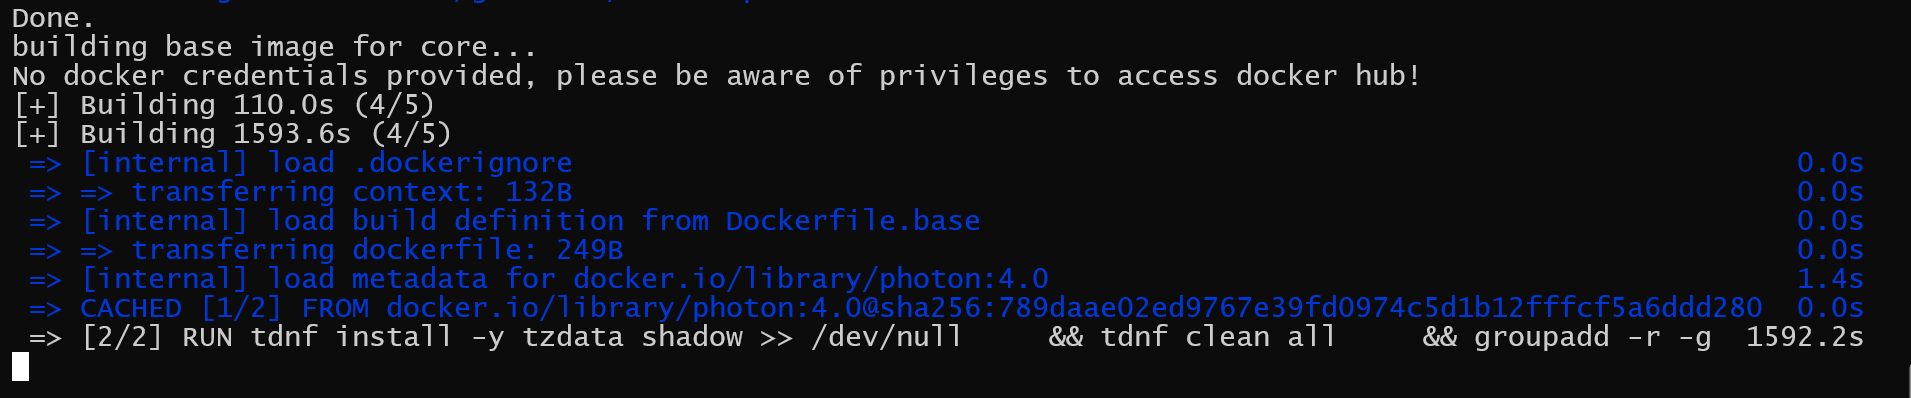
Once this build finishes, you'll see a message similar to the following
...
Start complete. You can visit harbor now.
Verifying Installation
If the build is completed successfully after the eternity it takes, you can load harbor UI in your browser by going to the HTTPS port on your localhost.
Here's an example https://localhost:2400. Note that the URL has HTTPS.
You might get a certificate warning in the browser due to the self-signed certificate, ignore that and proceed.
If Harbor loads in your browser then viola, you did it. Good Job!!🤝
Stopping Harbor
To stop harbor, run the following command. It'll stop all running containers for harbor.
make downTesting code changes
If you want to make some code changes and check them, then run the following command
make versions_prepare compile_core build -e BUILDTARGET="_build_core" -e PULL_BASE_FROM_DOCKERHUB=false prepare startThis command will compile the harbor-core image, build the necessary components for it and redeploy harbor.
If you're working on some other image like the harbor-db or harbor-portal, specify/replace it at the place of compile_core in the command.
It depends on your changes, however, the command takes ~2-3 mins to complete for me.
So in this comparatively little time, you can see your changes live
This command is courtesy of Wang Yan. It saves the hassle of executing make install
25 mins just to see 2 lines of code changes is not a pleasant experience.
Been there, done that. Not at all a pleasant experience🥹😆
That's all. Hope you're able to get Harbor up & running now.
For any queries, help join the Harbor Slack channels at the official CNCF Slack.
Reach out to me on Twitter or elsewhere from my portfolio.
Like my content? Check out my other blogs.